Sunday 29 May 2016

Stampin' Up! Don't need an envelope_Card#04_2016

Hi Me again :-)

I made a card which don't need an envelope.


when I write message on card, I feel I have to fill all of empty space somehow, It gives me stress! so I generally like to make small cards :-) I usually make 4" x 4" or slightly smaller than this. because its unique size, that means I need to make an envelope too. also I like to make an envelope that I try to make it matches with a card design.


So Here is the card that combined with envelope, so don't need to think about to make an envelope!
Thank you for reading hard/strange English! I really appreciate it :-D


would love to explain by text, but you know me! I can’t explain how to make it in English.


so Filmed a video tutorial on how to make it. I really enjoyed making this project. I hope you too enjoy it  :–D

Have a fun to watch it!

Click to watch video on  Stampin' Up! Card #3_2016 Don't need an envelope


Cover paper - 8-1/4″x 3-7/8″
Card base -  Same size as cover paper or 1/16" smaller each side
Score - 2-1/2" , 5-1/2"
Stamp set - Thoughtful Banners, Baby Bear
Punch - Duet Banner Punch


hope you enjoyed this project :-) Please do use the hostess code to support Willowpiggy :-) (hostesscode shown in the top right of my blog for the current one!) If your order is over £150, please don’t use this code, You can be hostess and get the Rewards! Please feel to email me or visit FB page If you have any questions!

Jerim/Willowpiggy xxx

My New craft area :-)

Hi All my friends :-)
It has been long time to write to post on any blog!
in my mind, I wanted to write the 1st post about my craft area to have fresh start in my new blog :-) 
so I can write a post for project :-)

Long story short,
Until few month before we moved this house, I shared a room with my husband James as his office and my crafting office, then since Jacob is born, James and I would like to see bigger picture, so we decided to make a kids's bed room from out office room. and my huge crafting stuff need a space to breath, so generous MY HUSBAND James allowed me to use a corner of dinner area and I promised that won't use our dinning table for crafting. but I do craft on the dining table anyway(Sorry James!) 

Here are before and after photos
(I thought I had few photos before moved, but can't find anywhere! sorry)

This was my first area, but I needed more space, so moved around book cases


put some rails from ikea for punches, then I still need space for stamps (as I love every stuff is being displayed!)


So, I bought a dvd holder from carboot, £1! but I needed more space....so decided to go to ikea.... :-D


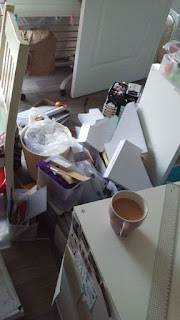
everywhere was messy while james helped me to put lovely shelves from B & Q :)

.
.
.
.
.
.
.
.
.
Ta - Da


Now force to divide paper/yarn/fabric crafting area, store them different places. Hope one day I can store them together and reunion crafting stuff :-)
Thank you for reading and If it doesn't make sense, I am so sorry! but It's already 1:37am. my brain is closing shop for now! 
Have a lovely day everyone. Bye Bye :-)